

Adding custom fonts to a react-native app was a real pain when I moved from the web to react-native. All we have to do on the web is add a script from Google Fonts, and yeah, use it! But it is not as straightforward as the web in react-native. I will walk you through the whole guide step by step to link custom fonts for the react-native version 0.6x. So let's get started.
Read also: NextJS - from React.js to an ultra-fast experience.
Add custom fonts using the command react-native link: Step-By-Step Guide.

1. Add the custom font files to the project
The very first step is to copy your fonts into your react-native project. I prefer to put my assets (fonts, icons, etc.) in the folder named assets in the root directory and later keep them in the subdirectories named fonts, icons, etc. So just put your custom font files to any location, but here I'm going to organize them my way, so below is my project directory structure.
myApp
|
+--android
+--ios
+--assets
|  |
|  +---fonts
|      |
|      +-- Montserrat-Bold.ttf
|      +-- Montserrat-Light.ttf
|      +-- Montserrat-Regular.ttf
+--react-native.config.js
2. Create a react-native config file with assets path
Next, create react-native config file names as react-native.config.js. You have to be careful while naming the file, as it should be the same.
Now add the path of the font files in the config file, as shown below. In my case, the path is ./assets/fonts.
module.exports = {
    assets: ['./assets/fonts']
}
You can add your own path where your font files are located. Confirm that your react native config file is in the root directory of your project.
3. Run the react-native link command
Now everything is set up, and you only have to link the font files to your android and iOS projects by running the following command
> npx react-native linkYou'll see the output of the command something like this.

It means your files are successfully linked to your Android and iOS apps 🎉.
4. Check the linked files in your project
You can confirm if your custom font files have successfully linked to your project by checking the directory of each platform
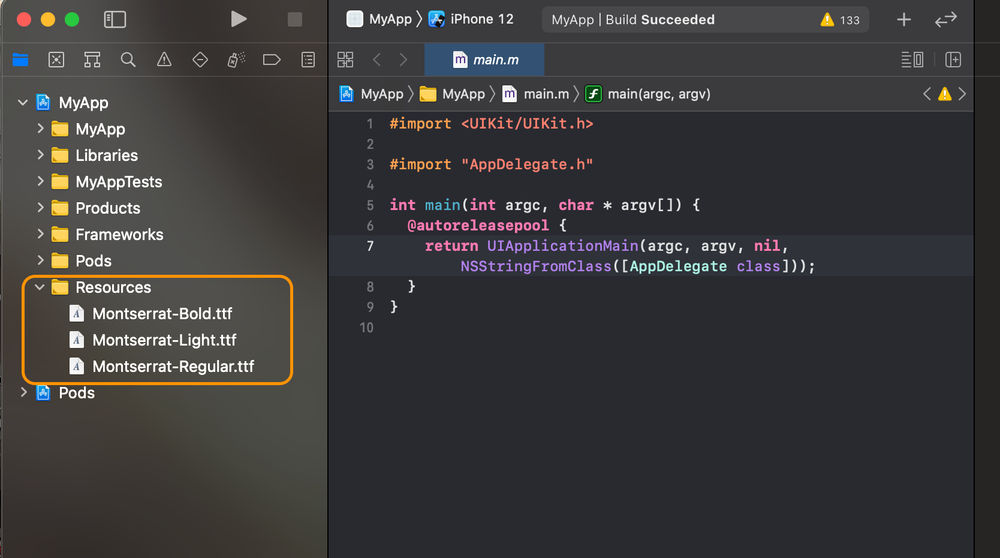
Checking linked font files in iOS
First, check the iOS to see if the font files are copied successfully in your app's resources folder.
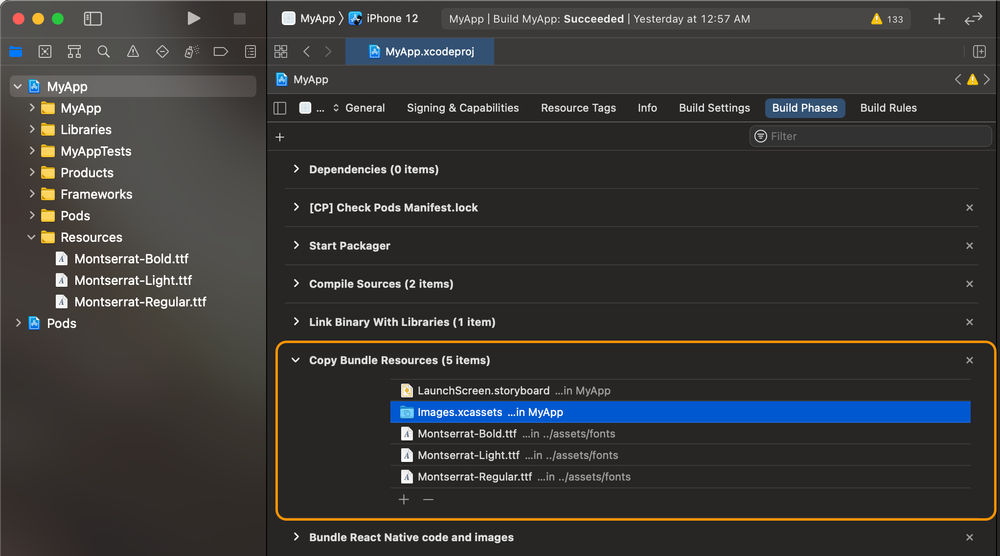
Second, check if the files are showing in the Copy Bundle Resources, in Build Phases as shown below.
Checking linked font files in Android
Now we will check if the font files are correctly linked to our Android project. To check in the Android, check the content under the path android/app/src/main/assets/fonts folder. As shown below.

As you can see, three font files are showing which we linked before. So you're all set for Android too. Now let's check the output.
5. Run both projects to see the newly added fonts
Now we've copied our fonts on both the platforms, iOS, and Android. Now we have to rebuild the apps to see the changes.
Just use your fonts in your project using the fontFamily property, as shown below.
title: {
    fontFamily: "Montserrat-Bold"
}
Now rerun the project using npx react-native run-ios and npx react-native run-android commands. You can now see your custom fonts. Cheers! 🥂'
If you're getting any issues, you can ask in the comment section below. Thank you!